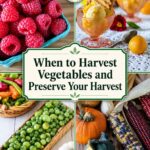
Harvesting the garden is one of the most rewarding parts of growing your own food. After months of planning, planting, watering, and weeding, it’s finally time to enjoy fresh fruits and vegetables at their peak flavor. This guide covers when to harvest common garden crops, how to store them, and several ways to preserve your harvest for later use.
In this guide, you’ll find tips on when to pick each crop, how to harvest them properly, and how to store and preserve your vegetables and fruits at peak freshness and flavor. At the end, you’ll find free recipes to help you use up your garden produce.
Pin
When to Harvest Your Garden Crops
Determining when your crop is ready to harvest varies by type. For a detailed harvest timing reference, see this Iowa State University harvest chart.
Crop
Days to Maturity
Harvest When
Radishes
20-30 days
Roots are small and firm
Lettuce
45-60 days
Leaves are tender before bolting
Cucumbers
50-70 days
Fruits are firm and bright green
Beans
50-65 days
Pods are young before seeds swell
Sweet Corn
60-100 days
Kernels release milky juice, top kernels full
Tomatoes
60-100 days
Fully colored and slightly soft
Onions
90-120 days
Tops fall over and brown
Pumpkins
90-120 days
Rind is hard and fully colored
Crops to harvest immature
Certain fruits and vegetables are best harvested young. They are tender and most flavorful when they’re immature. These include;
Carrots: Use a garden fork to loosen soil before pulling to avoid breaking the roots.
Lettuce: Harvest as small shoots or before they bolt (send up a flower stalk).
Radishes: Smaller radishes have better texture and flavor. Large radishes often develop holes.
Basil: Pick before it bolts to preserve flavor.
Broccoli: Harvest when heads are small and tight. Open buds can become tough and less flavorful.
Summer Squash: Pick while small for best texture. Large squash become pithy with large seeds and are better for baking or relish.
Cucumbers: Pick when small for better taste and texture.
Beans: Harvest before seeds swell. If you can see individual beans bulging, they are overripe and tough.
Eggplant: Smaller fruits are less bitter and have better texture than large eggplants.
Garden Peas: Pick when pods swell, but peas remain small for sweetness.
Sugar Snap and Snow Peas: Pick when pods are bright and swelling, while peas inside remain small and tender.
Asparagus: Harvest when spears are no larger than your pinky finger for maximum tenderness.
Pin
Crops That Can Be Harvested at Any Stage
Peppers, while both sweet and hot peppers are delicious when they are immature, (green jalapeños) they generally become more flavorful when they’re mature. Hot peppers are hotter when mature (like the red jalapeños in the image above).
Tomatoes ripen faster on the vine and are tastier when they’re left to mature there.
Berries Some berries may require netting to protect them from birds.
Crops Best Harvested Fully Mature
Some fruits and vegetables develop their best flavor and texture when allowed to fully mature on the plant.
Apples: Harvest when the background color changes from green to the variety’s mature color, and the fruit easily comes off the branch with a gentle twist.
Corn: Ready when the silks at the end of the ear turn brown and begin to dry out. To check, nick a kernel with your thumbnail. If a white, milky liquid oozes out, the corn is ready to pick.
Muskmelons and Cantaloupe: Harvest when the fruit has a sweet fragrance, and the stem easily slips away from the fruit with light pressure.
Garlic: Ready to harvest when the lower leaves have turned brown and withered, leaving a few green leaves at the top.
Onions: Harvest when the tops have fallen over and the leaves begin to brown.
Pumpkins: Ready when they have developed a deep, even color and the rind is hard. You should not be able to puncture the skin easily with your fingernail.
Watermelon: Look for a creamy yellow spot on the underside where it sits on the ground. The rind should be hard, and tapping the melon should produce a hollow sound.
Cauliflower: For self-blanching varieties, harvest when heads are still white, compact, and before the curds turn “ricey.” For non-self-blanching varieties, loosely tie the outer leaves over the head when it is 3–4 inches across, then harvest when the head is firm and fully sized.
Crops That Improve After a Light Frost
Some crops develop a sweeter flavor after a light frost, making them even better for harvest.
Carrots: A light frost helps convert starches to sugars, making carrots taste sweeter and more tender.
Parsnips: Frost enhances their natural sweetness, improving flavor for roasting and soups.
Kale: Leaves become sweeter and less bitter after a frost, making them perfect for fresh salads or sautés.
Winter Squash: While they should be harvested before heavy frost, a light frost can help improve sweetness and flavor in varieties like butternut and acorn squash.
Pin
Harvesting the garden
Harvesting your garden is one of the most rewarding parts of growing your own food. It’s often the easiest step, and it’s where all your hard work pays off.
For many crops, such as tomatoes, peppers, squash, and cucumbers, you can harvest by gently grasping the fruit and twisting it. Avoid pulling too hard, as this can damage the plant or root system.
For root crops such as carrots, radishes, onions, and parsnips, gather all the leaves near the base of the plant with both hands and pull straight up with a firm, steady motion. If the roots are deep or the soil is compacted, use a flat bar tool or garden fork to loosen the soil around the plant before pulling to avoid breakage.
Common Harvesting Mistakes to Avoid
Waiting too long to harvest
Many vegetables taste best when harvested young. Oversized cucumbers, zucchini, radishes, and beans often become tough, seedy, or bitter.
Harvesting wet produce
Picking vegetables while leaves and fruits are wet can spread plant diseases and reduce storage life. Wait until morning dew has dried whenever possible.
Pulling instead of cutting
Some crops, such as peppers, tomatoes, and squash, can damage the plant when pulled. Use pruners or gently twist fruits free.
Damaging roots while harvesting
Root crops like carrots, parsnips, and beets can break if pulled from compacted soil. Loosen the soil first with a garden fork.
Storing produce at the wrong temperature
Not all crops belong in the refrigerator. Tomatoes, onions, garlic, winter squash, and potatoes generally store better in cool, dry locations.
Forgetting to cure onions and garlic
Onions, garlic, and some winter squash store much longer when cured properly before being placed into storage.
Leaving ripe produce on the plant
Regular harvesting encourages many crops, including beans, cucumbers, zucchini, and peppers, to continue producing throughout the season.
Pin
Frequently Asked Questions
What is the best time of day to harvest vegetables?
Most vegetables should be harvested early in the morning when temperatures are cooler and moisture levels are higher.
Should vegetables be washed before storing?
Most vegetables store longer when left unwashed until ready to use.
What vegetables can be stored without refrigeration?
Potatoes, onions, garlic, winter squash, and pumpkins can often be stored in a cool, dark location.
How long can harvested vegetables last?
Storage life varies by crop. Some vegetables last only a few days while others can be stored for several months.
Can tomatoes ripen after being picked?
Yes. Tomatoes harvested at the breaker stage (when starting to show color) will continue ripening indoors, although vine-ripened tomatoes usually develop better flavor.
Storing your harvest – Harvesting the garden
A root cellar is one of the best ways to store your harvest, and many gardeners are bringing them back to their properties for long-term produce storage.
My grandparents had a root cellar under their house. Many were accessible only from the outside and had earthen floors with homemade shelves. These cellars stayed between 40–50°F year-round and never froze, making them perfect for storing canned goods and produce like potatoes, apples, winter squash, and onions. Good ventilation is important to keep produce fresh and prevent mold.
If you don’t have a root cellar, you can create a simple alternative by using a dedicated refrigerator set to 45–50°F. Add a bowl of water and a small battery-operated fan inside to increase humidity, creating a similar environment for storing your produce.
Some crops, including onions, garlic, potatoes, sweet potatoes, and winter squash, benefit from curing before storage. Curing allows the outer skin to dry and toughen, helping protect the crop from moisture loss and rot during long-term storage.
Storing Your Harvest: Exceptions
Most vegetables and herbs will last longer if they are refrigerated soon after harvest. However, there are a few exceptions to this rule.
Tomatoes: Store tomatoes on a sunny counter or windowsill (out of direct sunlight) after picking. You can rinse them before storing or wait until you’re ready to use them.
Basil: After cutting, place basil stems in a cup of water. Loosely tent the leaves with a plastic bag to create a mini greenhouse, and change the water daily to keep the basil fresh.
Parsley: Store like basil, in water with a plastic bag tent, changing the water daily.
Potatoes: Store in a cool, dark place with good ventilation.
Onions: Keep in a cool, dark space, ideally hanging in mesh bags for airflow.
Garlic: Store in a cool, dark, and dry place.
Melons: Keep in a cool, dark space until ready to cut.
Berries: Store in a cool, dark space and use within a few days, as they are highly perishable.
While some crops like potatoes and onions can last for several months in storage, others like berries will need to be used quickly to avoid spoilage.
How to Cure Onions, Garlic, Potatoes, and Winter Squash
Curing helps toughen the outer skin of certain crops, reducing moisture loss and improving storage life.
Onions Spread onions in a single layer in a warm, dry, well-ventilated location out of direct sunlight. Allow them to cure for 2–3 weeks until the necks are completely dry and the outer skins are papery.
Garlic Hang garlic in bundles or spread it on screens in a warm, dry location with good airflow. Cure for 2–4 weeks until the wrappers are dry and the stems are completely brown.
Potatoes After harvest, allow potatoes to cure in a dark location at 50–60°F with high humidity for 1–2 weeks. This helps minor cuts and scrapes heal before long-term storage.
Winter Squash and Pumpkins Cure winter squash and pumpkins in a warm location around 80–85°F for 10–14 days if possible. This hardens the rind and improves storage life. If temperatures are cooler, simply keep them in a dry, well-ventilated area for a few weeks before storage.
Pin
Preserving Your Harvest
Drying as a Means of Preservation
Drying fruits and vegetables is one of the oldest methods of preserving your harvest and is still a reliable way to save your summer crops for later use.
Many vegetables and herbs are perfect for drying. You can use an oven, grill, electric dehydrator, air fryer, or sun-dry them in dry climates.
Great candidates for drying include:
Apples
How to Dehydrate Apples | Apple Chips
Dehydrating apples is a simple and delicious way to preserve their natural sweetness and extend their shelf life.
Drying basil helps preserve its fresh flavor for use in sauces, soups, and as a seasoning all year long.
Beets
Beets transform into crisp, colorful chips that add earthy crunch to your snack lineup.
Air Fryer Beet Chips
These beet chips are vegan, whole 30, low carb and delicious! They are crispy, sweet and even healthy! Even the vege haters in the house will love these babies! Air frying makes them quick too!
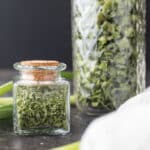
Dehydrated chives let you enjoy their mild onion flavor in dips, scrambled eggs, and dressings even in the middle of winter.
1
Pin
How to Preserve Chives | Store, Freeze, Dry
Preserving chives is an easy task that can save you money. Learn how to store fresh chives, freeze them and dry them 3 ways.Check out the end of this article for lots of great chive recipes.
Dehydrating garlic scapes is an easy way to preserve this delicious, early summer vegetable. Make garlic scape powder too. Great to add to so many dishes.
Peppers are perfect for preserving through dehydration, giving you a pantry staple that adds heat and flavor anytime.
Dried Peppers – 4 easy methods
There are many methods you can use for dried, or dehydrated peppers. A commercial dehydrator, or the oven, your grill, even your air fryer can be used for dried peppers.
This habanero recipe is an easy way to use up all of the habanero left on your plants in the fall! Hot Pepper flakes are a great habanero recipe to add to your pantry! Use a little bit of heat in all of your dishes throughout the year!
A handful of dried thyme can add bright, herbal flavor to roasted vegetables, soups, and marinades whenever you need it.
Tomatoes
Tomatoes dry into savory, crisp chips that pack a punch of flavor for snacks or soups.
Parmesan Tomato Chips
These incredibly easy dehydrated tomato chips will be your favorite snack. They are one of the easiest ways to preserve the delicious flavor of tomatoes long after your garden has stopped producing.
Drying helps concentrate flavors, saves storage space, and allows you to enjoy your homegrown produce throughout the year.
Pin
Freezing as a means of preserving crops
Freezing is a simple way to preserve your crops for later use. While some produce may lose texture when thawed, it still works well in soups, stews, sauces, and baked dishes.
Berries
Berries freeze beautifully for winter baking, jams, and smoothies. Spread them on a baking sheet, freeze until firm, then transfer to freezer bags.
2
Pin
Freezing Raspberries
Raspberries have such an incredibly short season. Freezing raspberries is a great way to preserve this fruit for use all year!
This low sugar Blackberry Jam Recipe is far superior to anything you can buy at the store! This Blackberry Jam Recipe is tart, yet sweet, and just tastes like a summer day!
Peel, slice, and blanch for 2–3 minutes. Freeze on a baking sheet until firm, then transfer to freezer bags.
Recipes for Using Frozen Carrots
Venison Stew, Slow Cooker or Stovetop
This Venison Stew is so easy! It’s so much healthier than beef, and has just as much flavor. The venison in this Venison Stew is neither gamey, nor tough. It is melt in your mouth tender, in the slow cooker or on the stove!
Cut cauliflower into florets and blanch for 3 minutes. Cool immediately in ice water, drain well, and freeze on a tray before transferring to freezer bags.
Freezing Cauliflower
Freezing cauliflower is a fantastic way to preserve its freshness and nutritional value for later use. This simple guide will walk you through the steps to properly freeze cauliflower, ensuring it remains tasty and versatile for your future culinary creations.
Cut kernels off the cob. Freeze on a baking sheet until firm, then store in freezer bags.
Recipes for Using Frozen Corn
Venison Stew, Slow Cooker or Stovetop
This Venison Stew is so easy! It’s so much healthier than beef, and has just as much flavor. The venison in this Venison Stew is neither gamey, nor tough. It is melt in your mouth tender, in the slow cooker or on the stove!
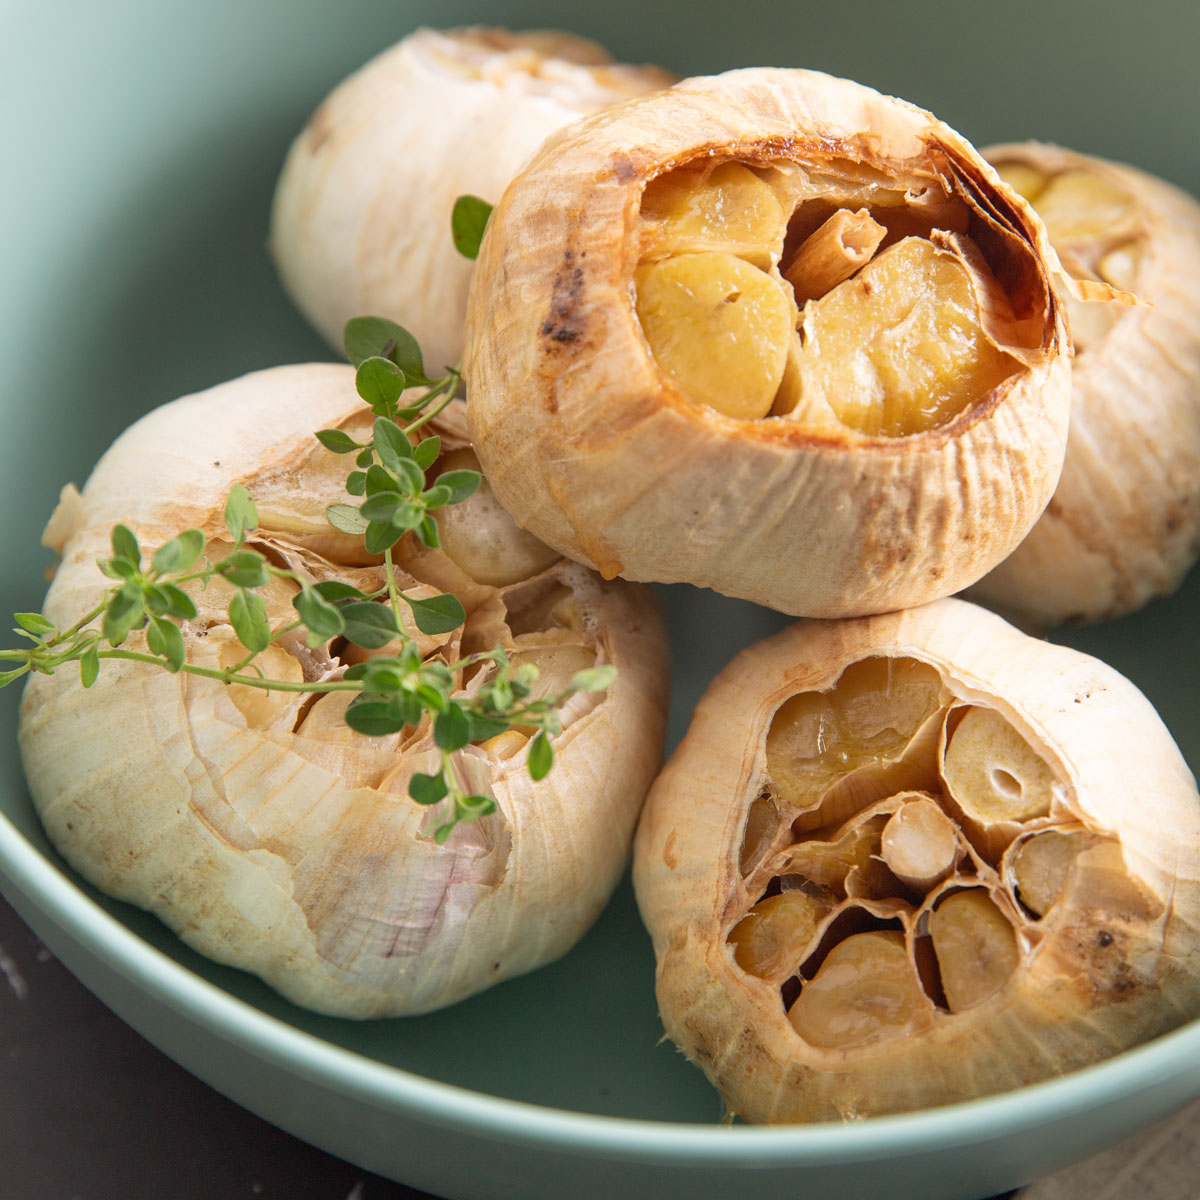
The best way to freeze garlic is to roast whole heads first, then freeze the roasted cloves for easy use in recipes. You can also peel and freeze raw cloves, but freezing roasted garlic preserves flavor and makes it easy to add to dishes.
RECIPES FOR USING FROZEN GARLIC
5
Pin
How to Roast Garlic in the Air Fryer, Grill or Oven
Roasted garlic is a fantastic ingredient to have in your kitchen that will elevate your cooking game forever. This step-by-step tutorial for how to roast garlic will cover the oven, grill and air fryer.
Melons freeze surprisingly well for smoothies, sorbets, and chilled drinks. Cut into chunks or balls, then freeze on a tray until firm. Transfer the frozen pieces to freezer bags.
Freezing Cantaloupe
Freezing cantaloupe is a brilliant solution to prolong its sweetness and savor it long after its peak season.
Freeze on baking sheets until firm, then transfer to freezer bags.
Recipes for Frozen Peas
Venison Stew, Slow Cooker or Stovetop
This Venison Stew is so easy! It’s so much healthier than beef, and has just as much flavor. The venison in this Venison Stew is neither gamey, nor tough. It is melt in your mouth tender, in the slow cooker or on the stove!
Pea Salad is such a classic spring salad! This Pea Salad Recipe is perfect to make when my Mom is coming because it is both gluten and dairy free! The best part is that it only takes a few minutes to put it all together! So much easier than potato salad!
Chop or slice your peppers, then freeze them in bags for quick use in cooked dishes later. You can also roast them first for a deeper flavor before freezing. Frozen peppers are a handy addition for quickly adding flavor to sauces, soups, and skillet meals.
Rhubarb
Freezing rhubarb lets you enjoy pies, crisps, and sauces any time. Slice and freeze on a tray before transferring to bags.
How to Freeze Rhubarb
Learn how to freeze rhubarb – step by step tutorial. Preserve that fresh taste of early summer to use on a cold winters' day.
This gluten-free Rhubarb Crisp is so easy and is a great gluten and lactose/ dairy free way to enjoy Rhubarb Pie! It is tart and sweet and incredibly easy!
Freezing spinach is a quick way to preserve your garden harvest for soups, quiche, and smoothies. Steam or blanch, squeeze out excess water, and freeze in portions.
7
Pin
How to Freeze Spinach | Freezing Spinach
Learning how to freeze spinach can save you a bunch of time and money. Frozen spinach is a healthy addition to your recipes.
This Lemon Zucchini Bread is perfectly moist and bursting with bright lemon flavor! Grated zucchini keeps it tender while lemon zest and juice add a refreshing citrus twist. It’s an easy quick bread you can make any time of year, delicious for breakfast, snacks, or dessert.
Peppers are one of the easiest vegetables to ferment, adding tangy flavor and probiotic benefits while preserving your harvest for sauces and meals year-round.
Fermenting Hot Peppers
Fermenting peppers is an easy way to lock in heat and build tangy, complex flavor you do not get with fresh peppers. Use this updated guide for exact salt ratios, two safe methods, and clear timelines for a short ferment and a long ferment. You will also find storage tips, flavor ideas, and troubleshooting so your jars turn out right.
Making fermented peppers at home, to make hot sauce, is easy! Fermented Hot Sauce is a great way to use your all of your chili peppers at the end of the season!
Pickling beets adds a sweet, earthy tang you can enjoy on salads, grain bowls, or as a bright side on your plate.
Quick Pickled Beets
These quick pickled beets are so easy. They only take a few minutes to prepare and are a great accompaniment to lots of dishes. No processing of jars is necessary!
Pickling cucumbers is one of the easiest and most popular ways to preserve them, adding a crisp, tangy bite to meals year-round.
Sweet Pickles
Sweet Pickles are the perfect thing to do with the plethora of cucumbers in your garden! They can be water bath canned or cold packed (quick pickled), for shorter storage!
Sweet Pickle Relish is one of the easiest ways to use the glut of cucumbers that ripen every year in the garden! Delicious on sandwiches and in salads!
Pickling onions is a simple way to add zesty crunch to meals while preserving your harvest for months.
Quick Pickled Onions
Quick Pickled Onions will only take 5 minutes hands on time and keep in the refrigerator for many months. Plus they get better with time! Perfect for your Cinco de Mayo party!
These Candied Jalapenos, otherwise known as Cowboy Candy, are such a great treat any time of the year. They're a great way to use up all of those jalapeños from your garden.
These spicy fish sandwiches are easy and fast and taste simply delicious. They’re perfect for a busy weeknight dinner since they’re done in 30 minutes or less. Buy a good pre-chopped coleslaw mix to make them even faster.
Pickled radishes bring a bright, zesty crunch to salads and tacos, and are a quick, easy way to use up extra garden radishes.
Quick Pickled Radishes
Pickled Radishes are super easy! No breaking out the canning pot in the heat of the summer! These are quick pickled, or cold packed and are the perfect condiment!
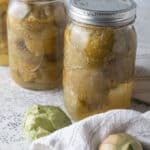
Pickling squash gives this versatile vegetable a tangy crunch, letting you enjoy your harvest in salads, sandwiches, or straight from the jar.
Squash Relish
Making squash relish is a great way to use up excess squash from your garden. It is a sweet relish that is delicious on so many things. For mere pennies, it's easy to stock the pantry with jars of squash relish. The best part is that it is one of the easiest canning recipes you will find. Making a large batch requires only about 20 minutes of hands-on time, so this recipe is perfect for beginners.
Pickling zucchini is a great way to enjoy this summer vegetable with a crisp, tangy twist.
Zucchini Relish
This Zucchini Relish is a favorite of everyone who tries it! I get requests for it often and it’s a great way to use up all of the zucchini in your garden! It tastes very similar to cucumber relish and is a great use for and abundance of zucchini.
Capture the taste of summer by turning your fruits and vegetables into jams, jellies, salsas, and sauces that fill your pantry with flavor all year. All you need is a water bath canning pot.
Apple
Apple jelly and apple butter add cozy flavors to your pantry for easy breakfasts and baking.
Apple Pie Filling | Canning Instructions
Canning apple pie filling is the perfect way to preserve your harvest of apples and enjoy a sweet treat all year long.
Canning apple juice is one of the easiest ways to put up your harvest. It’s a simple process that gives you smooth, mellow juice with no added sugar, preservatives, or mystery flavors. Just apples and water. Fresh, all-natural apple juice is a must-do when processing your apple harvest. Canning apple juice is easy, and kids and adults will love it equally.
Blackberries create rich, sweet-tart jams that capture summer in a jar.
Low Sugar Blackberry Jam
This low sugar Blackberry Jam Recipe is far superior to anything you can buy at the store! This Blackberry Jam Recipe is tart, yet sweet, and just tastes like a summer day!
Cherries can be turned into sweet sauces, jams, and pie fillings, adding a bright red pop of flavor to your recipes.
Cherry Jam
You can easily make your own homemade cherry jam in less than one hour. Start to finish! Once you make your own, it will be hard to go back to store bought! Fair warning!
Canning your own cherry pie filling is a great way to enjoy peak cherry season all year long. Whether you use fresh-picked sour cherries or frozen ones, homemade pie filling beats anything you’ll find at the store.
Cranberries cook down into vibrant sauces and spreads that brighten your pantry and add tart flavor to meals.
Cranberry Maple Butter
This Cranberry maple butter spread is a wonderful way to preserve the flavors of cranberries and enjoy them throughout the year. If you want to can it, we’ll walk you through it step-by-step.
Cranberry Pepper Jelly is an easy, sweet spicy jelly that is perfect as a glaze, as an addition to appetizers and is perfect for a unique gift for the holidays!
This easy recipe for canning strawberry pie filling only has 5 ingredients. It is incredibly easy. Make the sauce and refrigerate or water bath can it for longer storage.
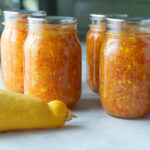
Canning tomato soup is a great way to preserve the flavors of summer for year-round enjoyment. Whether you grow your own tomatoes or purchase them in bulk, canning tomato soup is a cost-effective and easy way to create a pantry staple that you can use in a variety of dishes.
What do you do with all of the green tomatoes left on the vines in September, October? Why you make this amazingly delicious Green Tomato Salsa! Green Tomato Salsa couldn’t be easier, and it cans and freezes well!
This Chipotle Salsa has a wonderfully deep, smoky flavor that adds an irresistible flavor to each bite. It's one of my favorite salsas for canning, which means you can enjoy the bold taste of summer even when it's snowing outside!
Canning your fruits and vegetables whole or sliced is a great way to keep your harvest shelf-stable while saving freezer space for other foods. A pressure canner is required for canning some fruits and vegetables, whole or sliced. Others can be processed in a water bath canner. More recipes coming soon.
Asparagus
Canning asparagus lets you enjoy its tender texture and earthy flavor year-round, ready for quick sides and casseroles.
Canning Asparagus
Canning asparagus is a fantastic way to extend asparagus' short season. You can enjoy asparagus all year with lots of jars on the pantry shelves.
Canned potatoes make delicious mashed, home fries, or grilled potatoes for shish kebabs. They are also delicious in soups and stews.
Canning Potatoes | How to Can Potatoes
Canning potatoes at home is a safe and simple way to preserve your harvest for long-term storage. This step-by-step guide will walk you through the process of safely preparing, processing, and storing potatoes using a tested hot-pack method.
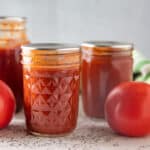
Canned tomatoes are one of the most versatile staples, ready for sauces, soups, and countless recipes.
Canning Whole Tomatoes
Learn all about canning whole tomatoes. This step by step tutorial is perfect for beginners or those with lots of canning experience. One of the easiest ways to preserve your tomato harvest to utilize all year long!
These ground beef tacos start with a low and slow-simmered ground beef sauce and end with a party for your tastebuds. They are easy and incredibly delicious. It's wonderful for Cinco de Mayo or just a regular taco Tuesday.
Spice up your next gathering with the ultimate comfort food station: a DIY chili bar. This fun and interactive party experience allows guests to customize their own bowl of hearty chili with various delicious toppings and sides.
Whether you’re a seasoned chef or a beginner, this Pozole Verde is a great way to enjoy the delicious flavors of Mexico in the comfort of your own home.
This Asparagus Soup Recipe is so very easy! It’s a great way to use the hard ends that you break off of the asparagus and discard! It’s also Vegan, Gluten Free, Dairy free, and paleo (check the brand of coconut milk you buy. It should only have coconut and water).
This Shrimp & Asparagus Quiche is so delicious! It’s also perfect for Mother’s Day Brunch! Put together in less than 30 minutes and then relax while the oven cooks it.
Fresh beans add crisp, garden flavor to salads, skillets, and simple vegetable sides. They are also an excellent source of plant-based protein.
Green Beans Almondine -Amadine
Green Beans Almondine has to be one of the easiest vegetables dishes to make! It is great for the holidays, because the green beans can be blanched the day before and then can be finished in a few minutes!
These Instant Pot Pinto Beans are so incredibly easy and so delicious! Perfect on all your favorite Mexican dishes and there is no need to even soak them!
Fresh beets bring earthy sweetness and vibrant color to your meals, perfect for roasting or salads.
Honey Roasted Beets
Honey Roasted Beets are not only delicious, they are an easy tasty side dish for the holidays or for any day. With just four ingredients, these beets only take about 30 minutes to roast to delicious, tender perfection.
Brassicas add hearty texture and nutrition to meals, great for roasting, stir-fries, and casseroles.
Colored Cauliflower
Oven Roasted Cauliflower is an easy vegetable side dish to make for the holidays, or just any weeknight! This cauliflower takes about 5 minutes to prepare, and the oven does the rest!
Broccoli Salad with Raisins is a fresh, easy side salad for your next BBQ or potluck. It only takes less than 30 minutes to make and has pepitas for extra crunch!
Fresh cabbage is versatile for slaws, sautés, and soups, adding crunch and mild flavor.
Irish Colcannon
Colcannon is a traditional Irish mashed potato dish made with tender cabbage, green onions, and plenty of butter. It’s creamy, flavorful, and the perfect comfort food for any meal, especially around St. Patrick’s Day.
Spicy coleslaw is a zesty twist on the classic side dish, perfect for those who love a little extra kick in their meals. This recipe combines crisp vegetables with a fiery dressing, creating a deliciously bold and refreshing salad.
Whether you need a dish to pass for a potluck or you are enjoying some delicious seafood tacos, this Pineapple slaw is just what you need. It's incredibly easy and will be hit every time.
Fresh carrots bring natural sweetness and crunch to salads, sides, and roasted vegetable medleys.
Brown Sugar Glazed Carrots
These Brown Sugar Glazed Carrots are an easy and delicious side dish for any meal. Glazed with butter and brown sugar, they also are known as burnished carrots, or roasted carrots. With just 3 ingredients, cooking them on the stove top makes them fast and easy! Elegant enough for company, easy enough for a work night!
Carrot Raisin Salad is a vintage dish that is perfect for last-minute entertaining. It only takes about five minutes to prepare and is so delicious. There is a reason it is still popular today. It's easy and delicious
This retro recipe for Orange Carrot Jello Salad is just like your grandma made. It is cool, sweet and a bit crunchy. Perfect for summer BBQs and picnics.
Air fryer honey-roasted carrots are a delicious side dish for any night of the week. They are also perfect for the holidays when your oven and stovetop are so full you can't put another thing in them.
Crisp cucumbers are refreshing in salads and sandwiches, bringing a garden-fresh crunch. They also make a surprising summer dessert.
Cucumber Sorbet
Skip the fancy spa and make your own Cucumber Sorbet! It’s so easy and a great use for all of those cucumbers you are picking from your garden! Fresh cucumber recipes are hard to come by if you don’t want to do pickles or relish! This is one of the easiest uses for your excess of cucumbers! Cucumber Sorbet is a famous palate cleansing recipe!
Traditional cucumber sandwiches are a cool, refreshing, and light summer lunch that will satisfy your hunger but won’t fill you up like a heavy lunch would.
This Cucumber Water Recipe is amazingly easy and really good for you in so many ways! Spruce it up with lemon, lime, orange, berries or a variety of herbs!
Fresh peas add sweet, tender flavor to salads, stir-fries, and light pasta dishes.
Pea Salad Recipe
Pea Salad is such a classic spring salad! This Pea Salad Recipe is perfect to make when my Mom is coming because it is both gluten and dairy free! The best part is that it only takes a few minutes to put it all together! So much easier than potato salad!
With this incredibly easy Instant pot Boiled Potatoes recipe, you can have fork tender potatoes in a fraction of the time of boiling them on the stove. They are consistently tender and delicious.
These Instant Pot Lamb Tacos are a wonderful addition to your Taco Tuesday lineup. They only take five minutes to prepare and cook in the Instant Pot in 40 minutes.
This gluten-free Rhubarb Crisp is so easy and is a great gluten and lactose/ dairy free way to enjoy Rhubarb Pie! It is tart and sweet and incredibly easy!
Air Fryer Butternut Squash gets caramelized spots just like roasting them, so they’re sweet, a bit smoky and utterly delicious in a fraction of the time.
Although it doesn’t really taste like mashed potatoes, the naming of this mashed potato squash will be obvious. If it’s mashed, it looks just like mashed potatoes.
This Roasted Butternut Squash Recipe is easy and delicious! With just 3 ingredients, you’ll find out how to roast butternut squash the easy way! No peeling or chopping required! Oven roasting takes all of the work out of the task.
These Chicken Stuffed Tomato Bites are an easy gluten and dairy appetizer for any occasion! Best part? They are no cook, economical and take all of 15 minutes to make a enough for a party!
Apple Crumb Pie has lovely spiced apples with a buttery, crunchy crumb topping. This Dutch Apple Pie is much easier than a traditional double crust pie!
Plump blackberries bring rich, tangy sweetness to your breakfasts, salads, and desserts.
Blackberry Pie Recipe
This Blackberry Pie Recipe is easy and a perfect summer dessert for a picnic or BBQ. Flaky pie crust and a not to sweet filling make this recipe stand out!
This Venison with Blackberry Sauce is elegant enough for company but simple enough for a weeknight dinner. The rich berry sauce brings out the best in the lean meat, and it pairs beautifully with roasted or pureed vegetables.
Blackberry Crisp is such an easy dessert for any time of the year. It is a great way to use up lots of blackberries! You can make this crisp with fresh or frozen fruit. It's also easy to make crisps gluten-free, dairy-free, and vegan. They can also be made with or without oats.
Nothing says summer like fresh peaches, ideal for grilling, baking, or tossing into salads.
Peach Sorbet
If you’ve got a ton of peaches, make this easy Peach Sorbet! It is super easy, vegan and the perfect no-guilt end of summer treat! You can make peach sorbet with or without an ice cream maker! No cutting up peaches either!
These Grilled Peaches with Blackberry Sauce is an easy summer dessert that is fresh, tart and sweet, all at the same time. Perfect for summer entertaining!
Peach Tea is the quintessential end of summer, drink! This Peach Iced Tea is super easy and special because the sun does all of the work for you! This tea can be made into a sweet tea, or just enjoy it unsweetened!
These easy Homemade Raspberry Cinnamon Rolls are the epitome of the perfect lazy Sunday breakfast! Treat your family to these novice friendly yeast rolls for the holidays or on any old Sunday! Are you a newbie to yeast breads? No worries! We’ve got you covered!
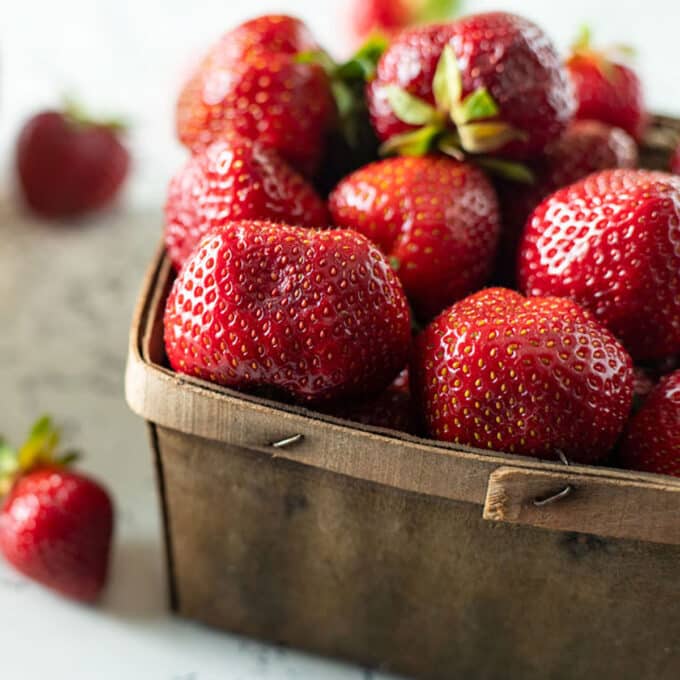
Fresh strawberries shine in salads, shortcakes, and chilled desserts during peak season.
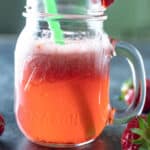
Strawberry Salsa
This Strawberry Salsa is so versatile! You can literally use what you have in the pantry! One of the reasons I love Strawberry Salsa is that it’s so easy!
This Grilled Brie Appetizer with Balsamic Strawberries is the perfect, ridiculously easy appetizer for your next cook-out! I am making it again for the 4th of July!
These Strawberry Infused Sea Scallops are not only gorgeous but they take less than 40 minutes, including marinating and have a wonderful hint of strawberry!
Pin
Strawberry Vinegar
Here's a unique and aromatic treat that will lend an extra zest to your salads, desserts, and cocktails – Homemade Strawberry Vinegar!
There are, indeed, thousands of ways to preserve your precious crops so that you can enjoy them throughout the year. If you’ve been thinking about starting a garden, consider planting a few crops this year to experience the satisfaction of growing and preserving your own food.
If you missed the rest of the series, start with Planning Your Garden to lay a solid foundation for your gardening season.
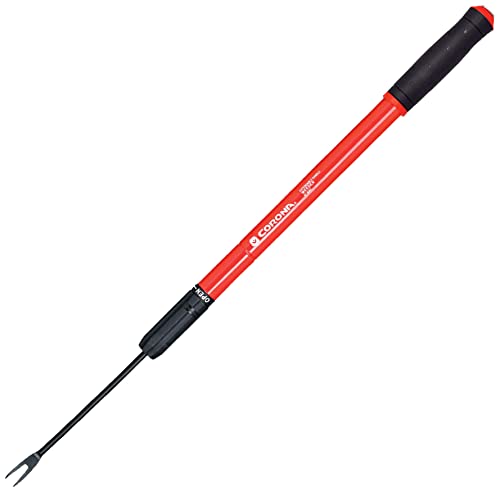
Tools for Harvesting the Garden
Contains affiliate links, for full disclosure, see FTC Disclosure, here.
I hope you have enjoyed this series on ‘How to Start a Garden’ and that it is, and will continue to be, helpful to you now and in the future. Thanks for stopping by today!
Please ask any questions or share your comments in the comments section below. We’d love to hear from you.
I hope you enjoyed the recipe today.
Enjoy. And have fun cooking!
Pin
Pin
How to Harvest and Preserve Your Garden Produce
Harvesting your garden is the most rewarding step in growing your own food. This guide will help you know when and how to harvest your fruits and vegetables, as well as how to store them at peak freshness. You'll also find links to over 200 recipes for preserving your crops through freezing, drying, canning, and pickling, so you can enjoy your harvest all year long.
See Step by Step Photos Above!Most of our recipes have step by step photos and videos! Also helpful tips so that you can make it perfectly the first time and every time! Scroll up to see them!
Get New Recipes Sent to Your Inbox Every Friday!Sign up to our newsletter Binky's Culinary Carnival!
This post may contain affiliate links, which means I get a small commission if you click the link and purchase something, at no additional cost to you. See FTC Disclosure, here.
Originally published June 11, 2019. Updated June 21, 2026.
Beth Neels is an entrepreneur, blogger, photographer, author, and recipe developer. She founded Binky’s Culinary Carnival in 2014, focusing on “Crafting delicious recipes with sustainable ingredients.” She has been featured in multiple online publications, including MSN, Reader’s Digest, AP news, and Parade.