Part 2; Vegetable Garden Preparation


Vegetable Garden Preparation is the next step, after Planning your Vegetable Garden! Site Preparation is essential to having a great, successful harvest!

[feast_advanced_jump_to]
Once you have done all of the Planning for your Vegetable Garden, like setting up your garden plot and determining how many hours of direct sunlight your garden gets. you are ready to prepare your future site for planting. Great Vegetable Garden Preparation is one of the most important things you can do to ensure a great outcome from your garden this summer and fall!

Stripping the Sod
The first chore is to strip the sod from the intended garden space. The sod roots only go down about 6″ so this is not a difficult process.
It can be accomplished with a flat spade, or, for larger gardens, you can rent a sod cutter from local equipment rental companies. There are also landscape companies that you can hire to help with the soil preparation.
Tilling the Soil
Once the sod is stripped, the soil needs to be worked up to a depth of 12″-14″, with a spade. Place 3-4″ of compost or aged animal manure on top of the soil.
Then dig and turn the soil, or use a mechanical rototiller. This will incorporate nutrients into the soil and it will aerate the soil so that the vegetables’ roots will have an easier time growing.
Once the season is over it is beneficial to plant a cover crop or green manure such as rye, oats or clover to protect the exposed soils.

Test your soil
It’s is important to send you soil to a soil testing facility. Many extension services will perform tests for a small fee to determine the texture of your whether you have clay soil or sandy soil and determine the organic matter that is available in your existing soil.
They will also test soil pH and give you recommendations on the use of lime, sulfur or other soil amendments to make your chances of harvesting a great crop by the end of the growing season.
Soil Quality
There are many factors that contribute to the quality of your soil and if it suitable to grow healthy, disease free plants. Some of these are the microorganisms, bacteria, earthworms, protazoa and others that improve the health of your soil.
In most cases, most soils will benefit from well aged organic compost pile materials to boost the health and texture of the soil. This is especially true for soils that lean towards high silt or clay compositions.
Raised Bed or Container Garden Soil Preparation
To prepare your raised bed or container garden for planting, if reusing, aerate or till soil because the soil will compact over time.
Add fresh compost and peat moss and till these into existing soil. Add your preferred fertilizer, according to directions on package (more on fertilizers below).
If reusing pots, it doesn’t hurt to scrub the inside with a brush and a mild bleach solution, just to kill any fungi that may be on the pot. This isn’t necessary, but can be helpful, if you had a fungal problem the year before.
If you are starting from scratch, I recommend a mixture of 2 parts topsoil, 2 parts peat moss, 2 parts wood mulch and 1 part horticultural grade vermiculite or perlite.
If the topsoil is terribly heavy, I may add 1 part all purpose sand to the mix, as well! These proportions are not crucial, just eye it. This mixture will give you great drainage, along with, great water holding capacity.
All of these materials are available at your local garden center, and are economical. For larger containers, water retaining polymers can be added, to help you keep them watered, especially in dry, or more arid climates.
Here is a good article from Fine Gardening regarding soil for containers.
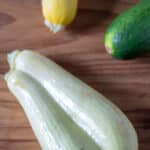
Crops that perform well in raised beds include lettuce, tomatoes, peppers, many herbs, radish, and spinach.
Some of these will tolerate partial shade but most vegetables require full sun (6-8 hours direct sunlight), so place your garden plot properly.

Building Structures
In our sample design, above, we have planned on a trellis, or fence for our cucumbers to grow on. Tomato cages can also be used to grow cucumbers on. (photo below) This can be as simple as a piece of chicken wire strung between two posts, or as complex as your imagination takes you!
The other structure in our design is a teepee for the pole beans to grow on. Again, this can just be a few wooden poles strung together with string, or a pressure treated/ metal structure that is more permanent.
Just make sure it is strong enough to hold the bean plants as they grow up it, in addition, they should be movable, so that you can till next year. Create any paths that you will need to access your vegetables, for planting, fertilization and harvesting.

Some plants, like squash, pumpkins and melons, prefer to be planted on a small mound, or hill of soil. Mound the soil up at least 6″ above the level of the rest of the garden.
Make the hill about 2′ wide and plant seeds on the mound. Usually 5-6 seeds per mound. Then they are thinned down to 2-3 plants per hill.
Weed Blockers for Vegetable Garden Preparation
Consider the fact that you will have to weed the garden for the rest of the growing season. To make your life easier, consider using some sort of weed blocker between the rows and in paths. There are many products available commercially to assist with this.
Landscape fabric, is a great commercially available product that will last several years, if removed in the fall, and reapplied the next year.
6 MIL plastic sheeting (make sure you buy black, or weeds will grow under it) is a good alternative, if you have somewhere to recycle it.
4″ of wood mulch or straw are great, organic options. Make sure that you source aged mulch, or the mulch will leach nitrogen from the soil. Leaf mulch is another good alternative.
Once you have installed the weed blocker chosen, cut rows, or holes for single plants, according to garden design plan.

Apply First Application of Fertilizer
Add commercial or organic fertilizer to rows or to holes prior to buying your plants. Water the fertilizer in thoroughly.
What Fertilizer Should I Choose
A brief lesson on fertilizers. Don’t fall asleep, this is important! 🙂
The important function that fertilizer will serve to your growing garden is to supply nutrients for your plants’ roots, stems, flowers and fruits.
Fertilizers all have a 3 number classification on them. This group of the 3 numbers is the most important thing on a bag of fertilizer. The first number represents the nutrient nitrogen (N), the second, phosphorus (P) and the third potassium (K). So N/P/K.
These 3 nutrients perform different functions in the plants. This is a very consolidated explanation! Nitrogen produces lots of healthy, green leaves. Phosphorus is important for root and bud formation. Potassium helps with root, bud and fruit growth.
Now that you have that information, think about what we are looking for out of our gardens. We want a great harvest, right?
Well, to obtain that great harvest, we need a nice healthy plant with strong stems, enough roots to supply water to our plants and lots of flowers to produce the fruits!
So for most flowering and fruiting plants we want fertilizers with a lower (or equal) N number and higher P and K numbers.
Most generic garden fertilizers sold are 10/10/10, 5/10/5 or 5/10/10. I prefer 5/10/10.
Some high end (read high $$) fertilizers will bump up the formulation to 18/18/21 or 15/15/30. Any of these will work, but as a general rule, you want all of the numbers close to the same, or with a little less nitrogen.
The lower the number on the bag, the more often you will need to fertilize, unless the bag specifies long acting.

Fertilizer Types
Fertilizers are broken up into 3 major categories.
- Natural, ie; aged animal manure, food scrap compost, etc.
- Commercially available Organic
- Inorganic, man made chemicals
Each of these categories has advantages and disadvantages. Here is a general overview;
Natural fertilizers are beneficial in the fact that waste products, that may find their way into landfills or leach into water systems can be recycled and will be turned back into soil as they decompose.
The risk with using natural fertilizers can vary, depending on the source of the compost. Animal manure can be dangerous to new plants if it is not thoroughly aged. If you use fresh manure, you risk burning your new plantings with soluble nitrogen. This could potentially kill them.
The advantage to using aged manure is that it’s a source of quick feeding. It is NOT as long lasting as commercially organic, or inorganic fertilizers.
Another disadvantage is that you do not know the actual formulation, that we talked about above, so you really just have to guess how often to reapply. Depending on the source, it may be very low in phosphorus and potassium, so you may have to supplement with P & K from a commercial source.
Think of natural fertilizers as quick acting and commercial fertilizers, whether organic or inorganic, as slow release, as a general rule, just like medications for humans.
The nutrient levels, in commercial products have been tested and are accurate, so that you know how often and how much to fertilize.

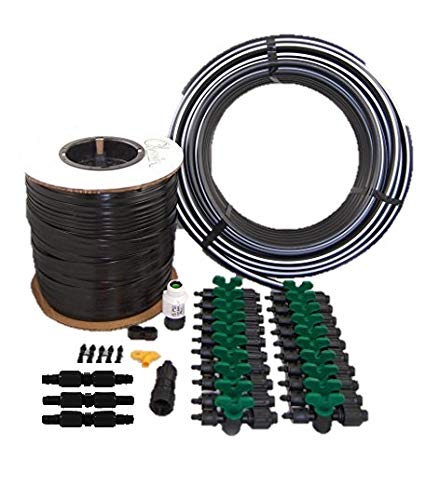
Irrigation
Before you plant your garden, you need a plan for how you will irrigate your garden! Your plants and seeds will need to be watered right after they are planted!
Your irrigation can be as simple as a garden hose and sprinkler attachment! You can get very complex with your irrigation, setting up drip irrigation to individual plants or rows, but this is totally unnecessary for most home gardens.
Just make sure that you have enough hose so that you can reach your entire garden, either by moving sprinklers, or adding additional hose lines.
Most home stores and garden centers sell timers that you can attach to your spicket and set to water at specific times. Some timers even have rain sensors, so that if it rains, they will not go on.
These are superior, because you do not want to overwater your crops! Always plan to water either early in the morning, before the sun gets too hot, or in the evening.
Although, do not water after dark, as this may encourage fungal growth. In addition, do not water when the sun is highest because the sun may burn the leaves through the water droplets!

Recipes to Make From Your Harvest on Binky’s Culinary Carnival

Summary
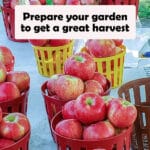
Vegetable Garden Preparation is an important step in successful gardening. Preparing your site and soil properly for your vegetable garden will ensure that your harvest will be the best it can possibly be.
These initial steps are crucial to a successful harvest. You have done the best you can do, now you just have to hope Mother Nature cooperates and gives you a great growing season!
Don’t forget to sign up to my newsletter, so that you don’t miss any new recipes! Only 1 email per week, on Fridays! Sign up form is below!
If you have any questions about your vegetable garden preparation, let me know in the comments below! I would love to hear from you!
Also, don’t forget to FOLLOW ME on Facebook, Instagram, Twitter and Pinterest!
Don’t miss the next article in this series, Choosing Plants and Planting Your Vegetable Garden! If you missed it, the first step to successful gardening is in the planning! See Planning Your Vegetable Garden to get started right! Thanks for stopping by today!
Enjoy! And have fun cooking!
Xoxo,


Tools I Use For Vegetable Garden Preparation
Contains affiliate links, for full disclosure, see FTC Disclosure, here.

Vegetable Garden Preparation
Ingredients
- 1 fertilizer
- 1 pre-emergence weed killer
- 1 plastic or weed barrier
Instructions
- Strip sod, if starting new garden
- Add soil amendments to surface.
- Rototill soil amendments into soil.
- Install drip irrigation, if using.
- Install plastic or weed barrier.
- Build any required structures.
- Set up overhead watering, if using.


Notes
This post may contain affiliate links, which means I get a small commission if you click the link and purchase something, at no additional cost to you. See FTC Disclosure, here.


