Part 3; Planting a Vegetable Garden

The third step in our How to Plant a Vegetable Garden covers the choosing of plants and Planting a Vegetable Garden. With our list of easiest vegetable plants to grow in your backyard garden and the top varieties to ensure you a huge harvest this summer!

[feast_advanced_jump_to]
Now that you have the perfect garden planned and the site and soil prepared, it is time to move to the fun stuff; picking out your plants and planting them!
There is just one more thing to decide, that being, should you plant a crop from seed, or should you use plugs (seedlings/ transplants)?

Should I Use Seeds or Transplants When Planting a Vegetable Garden?
There are a few factors to consider when making the decision to plant from seed or from plugs. The first, and probably most important is the length of your growing season. If you’re in the US, you can determine the length of your growing season by checking this map from the USDA.
Once you have your zone, you can look up a handy planting guide here, at Urban Farmer. Just click on your zone and a graph will come up telling you the optimal time to plant various crops!
The third factor to consider, is the length of time a particular crop takes to comes to maturity. If you live in a short season climate, and you want to grow a long season crop, you will have to start from transplants!

Building Structures for Plantings
Before you buy your plants, build any structures that you have included in your garden plan. In our sample design, we have a teepee for our pole beans, a trellis for the cucumbers and mounds for the zucchini to grow on.
So build everything the way to want it. It can be simple and functional or very decorative and functional, that is up to you.

Now, when you go to the garden center to buy all of your plants and seeds, you will have a list of what seeds you need, and what you need as transplants.
Buying Seedlings/ Transplants
When buying plants, make sure that the plants are healthy and bug free! They should be vivid green, not be dried out, spotted or yellowing.
That may be an indication that the plants have not been well maintained and you may, inadvertently, introduce insects or diseases into your garden!
I do not recommend shopping at “Big Box Stores” for your plants. Go to a local, reputable garden center, whose stock looks healthy and well kept.

Starting Seeds at Home to Use for Planting a Vegetable Garden
Starting seeds at home is not difficult. An artificial grow light, a sunroom, or a very sunny window is the most important. You need to have enough space under the light, as the plants grow.
They will need to be spread out, so that the entire plant gets light. Water consistently, but allow to dry between waterings. Start seeds in seed starter trays, or Jiffy 7 pellets, to make it easy.
You can use various other containers and soil mixes. Here is an extensive article from American Meadows.
Above photo; I have a small room with a large grow light. These plants were started from seed and have already been transplanted into cups.
That photo above was taken around April 7th. Below photo is the same plants, on April 26th. You can see the growth they have put on. I pruned them back twice, in the photo below, and fertilize with a liquid fertilizer, with every watering.
I will usually start my seeds prior to the recommendations on the seed packet by about 2 weeks. Only because I like to have big plants and get a jump on the growing season, but I have enough room to accommodate them.
If you do this, they will need to be transplanted into larger containers, once they outgrow the container they are in. They will also, most likely, need to be pruned back, so that they don’t get tall and leggy.
I have been recycling plastic cups (with a hole in the bottom for drainage) for many years and they work well.

Plants should be “hardened off”, or acclimated to the wind, sun and rain for at least 10 days, before planting in the ground.
Place small plants in a homemade hot bed, (here are instructions from Modern Farmer) or take them in and out of the house, placing them in a protected area at first, and then gradually getting them used to the full sun and other weather factors.

Planting Your Garden
Be sure to have your preparation work done. Set up drip irrigation or overhead irrigation systems prior to planting. Using a timer will make this job much easier to maintain throughout the growing season.
Be sure you have an effective way to control weeds.
Purchase fertilizers when you purchase your plants.
Set your garden up for success from insects and disease by using companion planting. Use annual flowers such as marigolds and nasturtiums to help control certain bugs.
After you have purchased all of your seeds and plants, you are finally ready to plant. Because you did all of the planning and preparation, you know exactly where each variety is going.
Planting Transplants
Most plants want to be planted at approximately the depth they are at, in the pot. Dig the hole about twice as big as the seedlings’ root ball.
Fill the hole back in with some the loosened soil. Then place the root ball in the hole and backfill around it carefully. Pack the soil around the sides of the root ball firmly, to lessen the chance that there will be excessive settling of the soil, as it is watered.
Don’t cover up much of the plants’ stem.
There is one exception to the above rule! Tomatoes! All tomatoes benefit from being planted deep. I usually plant them all the way down to at least, the first set of real leaves.
Up to 2/3 of the top growth of the plant can be buried and the stem will transform to root. There are several reasons to do this.
Tomato plants tend to be top heavy, and can break from the weight of ripening tomatoes on them. Planting them deep increases the amount of roots to hold the plant up.
This is especially beneficial for arid climates & windy climates, but it good practice for every situation.
Here is an extensive article on tomato planting and care, from the Almanac.

Planting Seeds
It is crucially important to the success of your harvest to read the instructions on the seed packets carefully!
The depth that the seed is planted at is essential for the plant to emerge from the soil. It is also a determining factor for the ultimate health of the plant.
Seeds that are planted deeper than the specifications suggest have a risk of not emerging from the soil at all.
Seeds that are planted too shallow may not have an extensive enough root system on them, to hold the plant up, or the seeds may dry out and die from lack of moisture.
If the packet of seed suggests thinning small plants, do it! If you don’t, individual plants may not have room to grow and develop to the optimal size for good fruit/ vegetable production.
Easiest Vegetable Crops to Grow in Home Gardens
When planting a vegetable garden, pick varieties that are best suited to your climate and needs. These are some of my personal favorite varieties. They perform well in my climate and soil type.
My hardiness zone is 6b and my soil type is silty clay, for reference.
It is best to try a few different varieties, especially when you are finding varieties that work best in your conditions. It also assists some crops with pollination.

Warm-season and cool-season crops
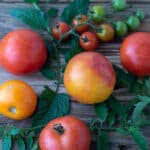
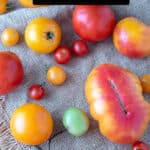
- Tomatoes
- Super Sweet 100 Cherry Tomato– indeterminate (plant continues to grow all season, so they can become very tall), Produces until first frost. Huge clusters of fruit. Super sweet. Bacterial disease resistant. Great for snacking, sauces, freezing, canning. 65 days.
- Yellow Pear Heirloom Cherry Tomato– indeterminate, Produces until first frost. Ultra sweet, pr ific bloomer, large crops. Heat tolerant. Has a tendency to split, if not picked just shy of fully ripe, but for me, the flavor made up for this flaw! Great for snacking, salads, sauces, freezing, canning. 74 days.
- Black Cherry Tomato– indeterminate, Produces until first frost. Ultra sweet. Prolific bloomer. Does best in hot, dry years. Great for snacking, freezing, salads, sauces, canning. 64 days.
- Celebrity– determinate (Plants stop growing at a certain height, usually around 4′), but still produces until first frost. Highly resistant to many pests. Early producer. Medium sized, meaty, great tasting tomatoes. Large yields. Perfect for slicing, sauces, freezing, canning. 65 days.
- Early Girl – indeterminate, Produces until first frost. Earliest producer. Disease resistant. Nice meaty tomato, great flavor. Amazingly heavy producer. Great for slicing, salads, sauces, freezing, canning. 50 days.
- Sweet Peppers
- California Wonder – green to red. Heirloom variety. 75 days to harvest. Freezes well.
- Sweet Banana Pepper – yellow to orange to bright red. Heirloom variety. 72 days to harvest. Great for pickling.
- Bull Nosed – green to yellow to red. Heirloom variety. Large fruit. 70 days to harvest. Thick walled, perfect for grilling, stuffing.
- Gypsy – yellow to orange to red. Perfect for frying, or eating raw.

- Hot Peppers, Chillies NOTE* All hot pepper varieties will be hotter in a hot, dry year/ climate than they are in wetter years.
- Jalapeño – hot. green to red. 65-80 days to maturity. Very productive. Great for pickling, canning, smoking, raw.
- Hungarian Wax – medium heat. yellow to orange to red. 60-85 days to maturity. Great for pickling, canning, raw.
- Red Hot Cherry – medium heat. green to red. Huge producer! 80 days to maturity. Great for pickling, canning, raw.
- Serrano – very hot. green to red. 75-90 days to maturity. Great for pickling, drying, raw.
- Habanero – super hot. yellow to orange. Best in warmer climates. Great for freezing, pickling, canning, drying.
- Cucumbers – grow on trellises so that they climb
- Marketmore 76 – slicing, 60 days to harvest.
- Marketmore 80 – slicing, 70 days to harvest.
- Salad Bush – slicing, dwarf, bush type, great for containers, 57 days to harvest.
- Regal – pickling, 52 days to harvest.

- Beans
- Pole Beans
- Stardust – easy, vigorous growth, 80 days to maturity.
- Kentucky Wonder – heirloom variety, heavy yield. 65 days to maturity.
- Bush Beans
- Blue Lake – early producer, most popular! 60 days to maturity.
- Tenderette – small, tender. 58 days to maturity.
- Cherokee Wax – yellow bean, tender, small, great flavor. 51 days to maturity.
- Pole Beans
- Squash
- Black Magic Zucchini – huge yields, small seed cavity. 50 days.
- Gold Rush Hybrid Yellow Squash – compact growth, prolific bloomer, huge yields. 45 days.
- Waltham Butternut – huge yields, sweet and tender 95 days.
- Honey Bear Acorn – small fruits, disease resistant. 100 days.
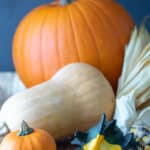
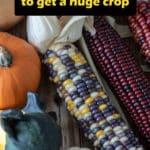
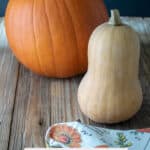
- Pumpkins/ Gourds
- Jack Be Little – small, pumpkin shaped, prolific. 100 days.
- Calabasa – early sugar or pie, 110 days.
- Jack O Lantern – bright orange, smooth skin. Perfect for carving, pies, freezing. 110 days.
- Large and small Mixed Gourds – lovely mixture of gourds for the fall. 80-100 days.
- Peas – cool season
- Daybreak – freezes well. 54 days
- Wando – mid season. Withstands some heat. 70 days.
- Spinach – cool season
- Space – resistant to some species Downey mildew. 45 days
- Red Cardinal– Red leaf veins and stems. Pretty in mixed green salads. 25-35 days
- Potatoes – cool season
- Kennebec – heavy producer. Some resistance to diseases and viruses. 80 days
- Yukon Gold – yellow, early potato. 65 days
- Red Pontiac – drought resistant. 80 days
- Kale -cool season
- Siberian Dwarf – cold and part shade tolerant. Small perfect for eating raw. 50-65 days
- Premiere – cold tolerant. slow to bolt, high yielding. 60 days
- Radishes – cool season
- Champion – deep scarlet, crunchy, 25 days.
- Cherry Belle – great crunch, mild flavor, stores well. 21 days.
- Lettuce -cool season
- Leaf lettuces
- Black Seeded Simpson – tender, sweet. heirloom variety. 48 days.
- Green Ice Leaf – tender, ruffled heads. heirloom variety. 45 days.
- Red Mist – tender, crisp, green with burgundy ruffles. Doesn’t bitter, even in heat. 40 days.
- Head lettuces
- Buttercrunch – heat tolerant, crunchy. Great for containers. 65 days.
- Romaine – piquant flavor, compact heads. 70 days.
- Leaf lettuces
- Carrots – cool season
- Imperator 58 Heirloom – old variety that is still a favorite. Straight, orange. 58 days.
- Kaleidoscope – a mixture of 5 different varieties. Red, orange, yellow, purple and white. 75-80 days
- Mustard
- Swiss Chard
- Beets
- Onions

A few vegetables that I do not recommend to new gardeners are the brassicas, namely; cabbage, broccoli, Brussels sprouts, cauliflower. Although these are some of my personal favorites, they are highly susceptible to many different insect and disease pests that have the ability to spread to other crops.
Best buy them at your local farm stand.
Perennials to Grow When Planting a Vegetable Garden
Perennial vegetables come up year after year and are best placed in a separate part of the garden that will not be plowed/ rototilled.
- Mary Washington Asparagus- sold in dormant root sections. Harvest after 3-4 years. Require a large space.
- Rhubarb- also planted from root sections, harvestable after first year.
- Strawberries, suitable for containers. Protect containers over the winter.

Annuals / Biennial Herbs to Grow in Home Gardens
- Parsley, technically biennial (comes up for 2 years) Best to replant every year.
- Basil, Important!! Best to grow in pots away from main garden areas! Seeds profusely and will take over a garden space in a short amount of time, with ample water.
- Dill, again, seeds readily, but not nearly as invasive as basil. Large plants 3′ tall.
- Coriander/ Cilantro, best to sow a supply of seed from April to October (with the exception of late June through early September) to maintain healthy leaf growth. Likes partial shade in the afternoon. About 2′ tall.
- Garlic, easy to grow. Needs good drainage. Plant in August to harvest the following July (in the Northeast US).
Perennial Herbs to Grow In Home Gardens
Grow these in a seperate area of the garden that will not be tilled.
- Chives, easy to grow in sun/ partial shade. Readily seeds, but not terribly invasive. Small, compact growth.
- Sage, 18″ to 3′ tall. Place in back of herb garden.
- Thyme, species. Many varieties available. Low growing/ creeping plants. Grow in front of garden, with ample room to spread.
- Oregano, many varieties available. 12-18″ height. Allow ample room to spread.
- Mint, Important!! Best to grow in pots away from main garden areas! Seeds profusely and will take over a garden space in a short amount of time!
- Rosemary – hardy in zones 7-10. Occasionally reported to overwinter in zone 6. Grows well in a sunny window indoors in the winter.

Delicious Recipes to Make with Your Garden Vegetables on Binky’s Culinary Carnival
- Chipotle Salsa
- How to Can Homemade Salsa
- Strawberry Salsa
- strawberry jam
- Grilled Brie with Balsamic Strawberries
Summary
Once you plan your garden and prepare the site it is time for the fun stuff! It’s time for Planting a Vegetable Garden. Determine whether you will start your crops from seeds or from transplants. Build any structures required for growing your crops.
Research which crops will perform best in your area. Plant your garden according to directions on seed packets or plant tags. Choose high quality plants with no visible signs of stress. Buy good quality seed.
Don’t forget to sign up to my newsletter, so that you don’t miss any new recipes! Only 1 email per week, on Fridays! Sign up form is below!
If you have any questions, please let me know how you like it in the comments below! I would love to hear from you!
Also, don’t forget to FOLLOW ME on Facebook, Instagram, Twitter and Pinterest!
I hope this post for Planting a Vegetable Garden was helpful to you! Again, I’m happy to answer your questions. Leave me a question in the comment section below! Thanks for stopping by today!
Don’t Miss the next article in the series Garden Maintenance. If you missed the first posts in the series start with Planning Your Garden!
Enjoy! And have fun cooking!
Xoxo,

Tools I Use for Planting A Vegetable Garden
Contains affiliate links, for full disclosure, see FTC Disclosure, here.

Choosing Plants and Planting a Vegetable Garden
Ingredients
- 1 vegetable seeds
- 1 vegetable plants/ plugs
- 1 tomato cages or stakes
- 1 fertilizer
Instructions
- Purchase plants and seeds as per the plan that you made in Step 1; Planning Your Garden
- Plant according to the plan you made in Step 1.
- Install tomato cages or stakes, immediately after planting.


Notes
This post may contain affiliate links, which means I get a small commission if you click the link and purchase something, at no additional cost to you. See FTC Disclosure, here.


