Canning Maple Syrup | Storing Maple Syrup
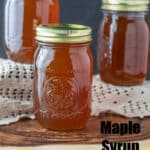
An easy step-by-step tutorial for canning maple syrup. Instructions include the best ways for storing maple syrup as well.

The term “canning” maple syrup is perhaps a misnomer. It would be, more specifically, Bottling Maple Syrup.
The reason for this is that the syrup is not processed in a water bath canner or pressure canner, in the traditional sense of the word. It is hot packed in sterilized mason jars or traditional food grade plastic bottles.
Making syrup in the backyard is a fun process for the whole family and something to do in the month that we have some of the worst weather of the year. (end of February to the end of March)
The sap of maple trees is collected and cooked down to reduce the moisture content of the sap. And then poured through coffee filters or layers of cheesecloth to make the syrup clear.
This is a semi- involved process and can require some specialty equipment so we won’t get too deep with that. Maybe next year we’ll do an article on making the syrup.
This method can also be used if you buy maple syrup in bulk.

The basics for making it
Basically, the old fashioned way, maple trees are tapped and the sap flows into a bucket. Buckets are collected and the sap is cooked down to remove moisture content, which in turn, increases sugar content.
The finished product should be between 26.5% and 39.4% moisture. This is measured with a hygrometer.
In addition, syrup needs to be cooked to a temperature that is 7.5°F above the temperature that water boils at, adjusting for elevation.
Then the syrup is filtered through cotton or cloth filters (a coffee filter will work for home applications) to remove “maple sand” or sediment in the syrup.
It takes about 40 gallons of sap to make one gallon of maple syrup.
What you need
- maple syrup – you can use homemade or store bought maple syrup. When we buy syrup, we buy at least a gallon and then can a bunch. That way we don’t have to store the gallon in the refrigerator and the unopened product lasts longer.
- pint canning jars
- quart canning jars
- lids and bands
- canning tool set
- ladle

How to can it
The goal of hot pack canning maple syrup is to try to reduce the possibility of contamination from microbes that will cause fungus growth. Although, there are always fungal spores in the air, so elimination is not really possible.
The key you need to keep in mind is that you want everything as sterile as possible in a home kitchen. So sterilize the ladle and funnel too.
First thing is to do is prepare the jars. Wash them well in hot soapy water and rinse them very well with hot water. You don’t want any leftover soap ruining your syrup.
Sterilizing jars
- If you are not using a canning pot with a rack, use a large pot and place a clean kitchen towel on the bottom so that the jars don’t knock around on the bottom. This could cause a jar to break.
- Add jars and water. Cover and turn heat to high. Once water is boiling, reduce heat a bit so the water doesn’t spill over.
- Add lids to another saucepan and turn the burner on very low. You don’t want the lids to boil, just become warm.
- Sterilize jars for 10 minutes. After the jars are sterilized, add your funnel and ladle to sterilize them.

Use great caution and wear heat resistant gloves to avoid burns. The hot syrup can cause severe burns!
How to bottle it
- Meanwhile, heat the syrup over medium low heat. An instant read thermometer (candy thermometer will work too) is handy for this step because you don’t want to overheat the syrup or it will turn darker and reduce the grade of the product.
- Heat to about 185°F (85°C). Never let it go over 200°F (93°C). Turn heat to very low.
- Dry ladle and funnel. Remove one jar at a time from the canning pot, after they are sterilized, with your lifter. Drain the water.
- Immediately fill hot jars with hot syrup, with the aid of your ladle and canning funnel, leaving ¼ to ½ inch headspace.
- Wipe rims with a damp paper towel. You don’t really have to worry about removing bubbles because of the liquid consistency of the product.
- Then immediately place on hot lid.
- Screw on the band. You don’t have to worry about the fingertip tight rule when canning this, since it’s not being processed. Screw it on nice and tight.
- Immediately turn the jar over upside down on the counter so that the hot liquid comes in contact with the whole surface. Leave it upside down for about 5 minutes. This is called an inversion technique.
- You can cover them with a kitchen towel, so that they don’t cool too fast in that first 5 minutes.
- After the 5 minutes, remove the towel. Flip them upright. Now you want them to cool off fairly quickly so that the color and texture don’t suffer. Separate the jars so that they are not touching. Use the fan in your kitchen or place a small fan near them to cool them off quickly. You should hear the lids ping as they seal but don’t panic if they don’t.

Repeat the process with your other jars.
Do not try to put them in cold water to cool off. The shock may crack the jar.
After 12-24 hours, check lids for vacuum seal. Press down in the center of the lid. If it flexes up or down it has not sealed and should be stored in the fridge and used first.
Use this delicious maple syrup on these easy waffle recipe for waffle maker
Storing maple syrup
The syrup in the jars that you canned / bottled should be stored in a cool dark place, like an old fashioned root cellar or an unfinished basement. They should have minimal exposure to sunlight.
Unopened jars of syrup have an incredibly long shelf life. At least two years, probably more.
Before consuming, check for mold on the top or a rancid smell. If either of those two conditions exist, it’s not safe to eat. The canners’ commandments says, “When in doubt, throw it out.” It’s not worth the risk of getting your family sick.
After opening, jars should be stored in the refrigerator for longest storage. Syrup will last for at least one year when refrigerated.
Note: When you store syrup in the fridge, the lid may develop crystallized sugar in between the bottle and the cap. Just run the top of the jar and lid under hot water for a few minutes and the jar will open right up. To avoid this, wipe the outside of the rim with a damp paper towel to clean up spills.

Freezing maple syrup
Did you know that syrup freezes very well? This is really the best way to preserve large batches of syrup without it spoiling. Process the glass jars as described above, but leave about a 1 inch headspace. Then place the jar in the freezer.
The syrup never freezes solid in the jar. It just gets thicker as the syrup cools. Any mold or fungal spores cannot grow in the frozen environment.
Frozen jars will last for an extended period of time, according to Purdue University. In other words, it lasts so long, it’s consumed before going bad.
To thaw, place frozen jar in the refrigerator.
Pro tips for your success
- Always label your jars with the contents and date so that you know when a product has potentially gone bad.
- Do not overheat the syrup to a higher temperature than 185° for canning. If it is heated over 200°F, after the initial process of removing the moisture from sap, the syrup will turn to maple sugar (with some elbow grease).
- Be sure to process one jar at a time so that the jars stay hot.
- After the initial 5 minutes of keeping jars hot, cool jars as quickly as possible with fans.
- When cooling jars, be sure they are not touching. They need air space in between them. We usually rotate them so that different areas are getting the air from the fan.
How to use maple syrup
- pancakes
- French toast
- waffles
- glazes for meats, like ham
- glazes for cakes
- ice cream
- maple cream
More maple recipes

There is no flavor in the world that compares to pure maple syrup. It is perhaps the quintessential breakfast condiment and it’s great for so many other things!
Connect with us through our social media pages! Facebook, Instagram, Pinterest, Twitter.
Please ask any questions or share your comments in the comments section below. We’d love to hear from you.
I hope you enjoyed the recipe today.
Enjoy. And have fun cooking!


Canning Maple Syrup | Storing Maple Syrup
Ingredients
- 1 gallon maple syrup
Instructions
- First thing is to do is prepare the jars. Wash the jars well in hot soapy water and rinse them very well with hot water. You don't want any leftover soap ruining your syrup.
- After you have clean jars, sterilize them in boiling water bath for 10 minutes. Jars must be sterilized because the syrup is not processed.
- While jars are sterilizing, heat the syrup. An instant read thermometer (candy thermometer will work too) is handy for this step because you don't want to overheat the syrup or it will turn darker and reduce the grade of the product. Heat to about 185°F (85°C). Never let it go over 200°F (93°C).1 gallon maple syrup
- Remove one jar at a time from the canning pot, after jars are sterilized, with your jar lifter. Drain the water.
- Immediately fill hot jars with hot syrup, with the aid of your canning funnel, leaving ¼ to ½ inch headspace.
- Wipe rim of jar with a damp paper towel. You don't really have to worry about removing bubbles because of the liquid consistency of the product.
- Then immediately place hot lid on jar. Screw on the band. You don't have to worry about the fingertip tight rule when canning. Screw it on nice and tight.
- Immediately turn the jar over upside down on the counter so that the hot liquid comes in contact with the entire jar. Leave it upside down for about 5 minutes. This is called an inversion technique.
- You can cover the jars with a kitchen towel, so that they don't cool too fast in that first 5 minutes. After the 5 minutes, remove the towel.
- Now you want them to cool off fairly quickly so that the color and texture don't suffer. Use the fan in your kitchen or place a small fan near them to cool them off quickly. You should hear the jars ping as they seal.
- Repeat the process with your other jars.


Can I put the jars in the fridge to cool off more quickly after I turn them right side up again?
It’s best not to. Let them cool to room temperature slowly and then refrigerate.
Just to be sure ….after adding hot maple syrup to jar and waiting for the vacuum seal and the jars are cooled off…12-24 hours….I can then put the jar in the freezer?
Thank you!
…also do you know how long an opened jar in fridge will last?
Yes, Syrup doesn’t expand or freeze solid like most things. It lasts at least 3 months, or longer refrigerated.