• Skip to primary navigation
  • Skip to main content
  • Skip to primary sidebar
Binky's Culinary Carnival
  • Recipes
    • Food Preservation
    • Venison &Game
    • Main Dishes
    • Desserts
    • Appetizers
  • What’s for dinner?
    • Venison & Game
    • Poultry
    • Pork
    • Seafood and Fish
    • Beef
  • Food Preservation
    • Water bath canning
    • Pressure canning
    • Freezing
    • Drying etc.
  • Contact
    • Work with me
menu icon
go to homepage
subscribe
search icon
Homepage link
  • Home
  • Recipes
  • Work with Me
  • Contact
    • Facebook
    • Instagram
    • Pinterest
    • Twitter
  • ×
    Home » Bread » How to make yeast – sourdough starter

    How to make yeast – sourdough starter

    Posted on April 7, 2020 By Beth Neels

    138 shares
    Jump to Recipe Jump to Video Print Recipe
    Sourdough starter Pinterest image
    Sourdough starter Pinterest image
    Sourdough starter Pinterest image
    Sourdough starter social media image
    Sourdough starter Pinterest image

    Making sourdough starter at home is so much easier than you imagine. A batch of starter only takes 7 to 14 days, perfect when you don’t have yeast.

    Quart jar with bubbling sourdough starter.

    When researching how to make sourdough starter years ago, I was absolutely intimidated. There was so much information and it seemed to be a bit more scientific that I had an interest in tackling.

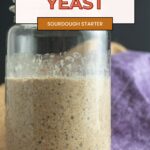
    Nothing could be further from the truth! Starter is easy and really very forgiving! Notice the line on the inside of the jar where you can see that the yeast grew and then reduced again.

    When you feed the starter, the yeast colony has a lot of new food to grow on. Once the colony has depleted the available food, it will reduce in size.

    Jar with starter showing the line of growth that starter had.

    What you need

    • flour (use rye flour, or whole wheat flour to start, rye inherently has more yeast, because it is less processed.)
    • dechlorinated water
    Ingredients in sourdough starter- rye flour dechlorinated water.

    Can you use tap water?

    Yes, you can use tap water if you dechlorinate it. How do you dechlorinate water easily?

    • Low boil water for about 15 minutes, uncovered. Let cool. Store in covered bottle at room temperature.
    • Use a commercial activated carbon filter to remove chlorine.

    Equipment needed

    • 1 quart plastic or glass container
    • kitchen scale
    Equipment needed- quart jar and kitchen scale.

    How to make it

    Day one

    1. Measure flour and water. It is best to weigh the quantities, it’s more accurate than measuring the volume.
    2. Measure 4 oz. / 113 g. rye flour (you can use white or whole wheat flour, see notes below)
    3. Measure 6 oz. / 170 g. dechlorinated water.
    4. Mix well in a large jar (at least 1 quart / 946 g) , make sure no dry flour is left. (either food grade plastic, or glass)
    5. Cover loosely with plastic wrap. I set the band to the jar on top, without securing it, so that the plastic can’t blow off, but it can also breath. Place in warm spot ( I use the top of the refrigerator) Cover jar with kitchen towel to block sunlight.
    Jar with flour and water. Flour and water mixed up. Jar covered with plastic wrap.

    Day two

    1. Remove half of the starter in the jar and discard.
    2. Measure 4 oz/ 113 g rye flour. Measure 4 oz / 3.8 ml water.
    3. Add flour and water with starter in jar.
    4. Discard is about 1/2 – 3/4 cup.
    5. Mix well again. Make sure no dry flour remains.
    6. Cover with plastic and towel again. Let sit for another 24 hours.
    Bubbling starter. Starter in jar. Flour & water added. Measured discard. Mixed starter.

    Day three

    After a few days I switch over to half rye and half white flour, only because my family prefers white. Once yeast is bubbly and has grown, you can keep storing at room temperature and feed it daily.

    You can continue to use rye or wheat flour for your starter, for that flavor bread. You can start with only white flour, but be aware of the fact that it will take longer for your starter to be ready. Typically at least 14 days.

    DAy 3 Bubbling starter. Starter in jar. Flour & water added. Measured discard. Mixed starter.

    Day four

    • By day four your yeast should be getting very bubbly.
    • Feed one half rye flour and one half white flour.
    • Mix well.
    • Store for 24 hours.
    Day 4- Bubbling starter. White and ryer flour in bowl. Flour & water added. Mixed starter.

    Day five and beyond

    After 5 days, I go to all white flour. By that time, the yeast is actively growing and bubbly.

    You can stick with rye or wheat flour, if you prefer.

    If using all white flour, the starter may get a bit less bubbly. Don’t worry, continue to feed white flour daily, until it gets very bubbly again.

    • Before feeding.
    • Before feeding
    • Add flour and water.
    • Mix thoroughly.
    Day 5+ Bubbling starter. Starter in jar. Flour & water added. Mixed starter.

    If you don’t want to feed it daily, you can refrigerate the starter and feed it only once per week. I usually do this during the summer, since I don’t bake much bread.

    Pro tips for success

    • Start yeast with rye or wheat flour. Preferably rye.
    • Use only unbleached flours. Bleached flour will not support your yeast colony.
    • Use room temperature, dechlorinated water, instead of tap water.
    • If you feed your starter every twelve hours, instead of every 24 hours, the yeast will be ready in less time.
    • Make sure your yeast is growing every time you feed it. That is a good indication that it is ready to use.

    When is my starter ready?

    Experts advise not to use your starter for at least 10 days after starting it, to ensure that the good yeast has taken over everything else. Make sure the yeast bubbles well and is growing daily, then the discard ready to use.

    Once you refrigerate starter, remove it from refrigerator. Allow it to get room temperature and feed it for at least 3 days before using the discard for recipes.

    What if I miss a feeding?

    Your healthy starter should smell sweet. After a few days of growing, smell your yeast so that you know what it should smell like. It should smell sweet rather than sour.

    If you miss a day feeding your yeast, smell your yeast. If it still smells sweet, then just feed it again, as normal. It will be fine.

    I have let it go for as long as 3 days without any ill effects.

    Close up of bubbling jar of starter.

    How to store yeast long term

    You can literally keep yeast going for years, decades, even centuries! You just have to feed your yeast colony, to keep it happy. The older the starter, the more “sour” the flavor of the sourdough.

    To keep your yeast colony alive, and ready to use, store it at room temperature. It needs to be fed every day, or every other day, while it is at room temperature.

    Longer term storage

    During periods when you are less likely to bake, (summer) you can store your yeast colony in the refrigerator. Feed the starter every 7-10 days. Then return to refrigerator.

    To bake with the yeast, it should be brought back to room temperature, and fed daily, for at least 3 days.

    Sourdough starter can be frozen for longer storage. When you are ready to use it again, thaw in refrigerator and then bring it room temperature, feeding it daily, for 3 days.

    Drying starter

    Starter can also be dried and then reconstituted and grown again. Just spread a thin layer of starter on parchment paper. Let it air dry for 1-2 days, until very dry.

    Crumble dried yeast and store in canning jar, or plastic bag. In a dry place.

    To reconstitute the starter, add a tablespoon of dried starter with 2 tablespoons of dechlorinated, lukewarm water, let soak for a few minutes. Then add 2 tablespoons of flour. Cover and allow to grow for 1 day.

    The next day, add 2 tablespoons of flour and a tablespoon of warm dechlorinated water. Let sit again for 24 hours.

    The third day, add 2 more tablespoons flour and only 2 teaspoons of water. Then proceed as normal, above.

    Starter with purple tea towel.

    How does baking and rising differ?

    Baking with sourdough starter, or homemade yeast can be a bit different than using commercial yeast.

    The dough may take longer to rise, particularly if you are used to using rapid rise yeast. Be patient and allow dough to rise until double in bulk, for most recipes.

    What I make with homemade yeast

    • Sourdough pizza crust
    • Sourdough buns

    Tools I use

    • quart canning jar
    • spatula
    • kitchen scale

    So in about 10 days, you can have your own batch of yeast to make all of your favorite breads!

    I will continue to add sourdough breads, so keep up with my new recipes on my social media channels, Facebook, Instagram, Twitter and Pinterest

    If you have any questions or concerns about making your starter, please ask in the comments below.

    That’s how easy it is to make homemade yeast, aka sourdough starter. Thanks for stopping by today!

    Enjoy! And have fun cooking!

    Xoxo,

    Binky's signature
    Square image of sourdough starter in glass jar.

    How to make Yeast aka Sourdough Starter

    Making sourdough starter at home is so much easier than you imagine. A batch of starter only takes 7 to 14 days, perfect when you don't have yeast.
    See Step by Step Photos Above!Most of our recipes have step by step photos and videos! Also helpful tips so that you can make it perfectly the first time and every time! Scroll up to see them!
    5 from 8 votes
    Print Pin Rate
    Course: pantry item
    Cuisine: American
    Prep Time: 10 minutes
    Cook Time: 10 minutes
    Growing time: 7 days
    Total Time: 7 days 20 minutes
    Servings: 10
    Calories: 160kcal
    Author: Beth Neels
    Cost: $1

    Ingredients

    Day One

    • 4 oz rye flour can use wheat or white. ** See notes in post.
    • 6 oz dechlorinated water see notes in post to make your own.

    Day Two

    • 4 oz rye flour
    • 4 oz dechlorinated water

    Day 3

    • 4 oz rye flour
    • 4 oz dechlorinated water

    Day 4 and beyond

    • 4 oz flour use any flour ** See notes
    • 4 oz dechlorinated water

    Instructions

    Day one

    • Mix flour and water in a container that holds about one quart. Food grade plastic, or glass is best. Loosely cover with plastic wrap. Place in a warm area of the house (like the top of refrigerator) for 24 hours. Place kitchen towel over container to eliminate light.

    Day Two

    • Discard half of the starter. Add 4 oz of flour and 4 oz of water to the container with the remaining starter. Mix well, so that there are no dry spots. Re-wrap with plastic and kitchen towel. Let grow another 24 hours.

    Day 3

    • Repeat steps from day 2.

    Day 4 and beyond

    • After 3 days, when yeast becomes bubbly, I transition to white flour. To get the starter going faster, use half rye flour and half white flour. After a few days using half and half, you can go to all white flour. Continue step 2 daily, if storing at room temperature.
    canning jars- Quart
    spatula, baking
    kitchen scale
    See all of my favorite tools and gift ideas on my New Amazon Store!Check out Binky’s Amazon Store!

    Video

    Notes

    To easily dechlorinate tap water, place in pan and low boil, uncovered for about 15 minutes. Let cool. Store in bottle at room temperature. 
    Use only unbleached flours for your starter.
    You can start with white flour, just be aware that the yeast will take longer to become active. Typically 14 to 21 days.
    Weights are a more accurate measurement than volume, in this case. Buy a cheap kitchen scale. 
    For long term storage, without feeding, you can refrigerate, freeze or dry the yeast. See article section “Long term storage”
    Yeast is more forgiving than commonly believed. If you miss a day feeding, just smell starter. It should smell sweet rather than sour. It will usually take several days without feeding for the yeast to smell sour. Continue feeding as usual, if yeast smells sweet.

    Nutrition

    Calories: 160kcal | Carbohydrates: 34g | Protein: 5g | Fat: 1g | Saturated Fat: 1g | Sodium: 3mg | Potassium: 139mg | Fiber: 4g | Sugar: 1g | Calcium: 10mg | Iron: 1mg
    Get New Recipes Sent to Your Inbox Every Friday!Sign up to our newsletter Binky’s Culinary Carnival!

    Originally published  4/3/2020

    « Chicken Fried Venison
    Coconut Shrimp with Lemon Marmalade Sauce »
    138 shares

    Reader Interactions

    Comments

    1. Michelle B

      April 16, 2020 at 10:14 pm

      5 stars
      Hi Beth, I am going to attempt to make my first sour dough starter. I’m so glad I found your recipe. I love your clear instructions. Wish me luck!

      Reply
      • Beth Neels

        April 17, 2020 at 11:37 am

        You got this Michelle! It is really not difficult! If you run into any difficulties, don’t hesitate to ask me!

        Reply
    2. Laura Tobin

      April 13, 2020 at 1:05 am

      5 stars
      Great article Beth, since we have been in lockdown I spend my mornings filtering Kefir, feeding sourdough, growing alfalfa, sorting out the vegetable patch and caring for the chickens. I have even contemplated getting a goat.

      Reply
      • Beth Neels

        April 14, 2020 at 10:08 am

        It seems we are all moving back to our grandparents time, at least a bit! Thanks for checking out the article, Laura! Stay safe!

        Reply
    3. Elaine Benoit

      April 10, 2020 at 1:18 pm

      5 stars
      What a great post. I am definitely going to try this. I’ve been wanting to ferment and get back to the basics for the longest time and now I have this to refer to. Thanks Beth!

      Reply
      • Beth Neels

        April 10, 2020 at 1:23 pm

        Thanks so much Elaine! If you have any problems with it, let me know and I’ll help you out!

        Reply
    4. Andrea Metlika

      April 07, 2020 at 11:03 am

      5 stars
      This is much easier than I thought. Completely appreciate your step by step, day by day instructions.

      Reply
      • Beth Neels

        April 07, 2020 at 11:20 am

        Thanks, Andrea! I’m glad it is helpful for you! Good luck!

        Reply
    5. Anita

      April 07, 2020 at 10:41 am

      5 stars
      Such a timely recipe, what with grocery stores running out of yeast. Will be giving this a try. 🙂

      Reply
      • Beth Neels

        April 07, 2020 at 10:44 am

        Let me know if you run into any questions Anita! Thanks for checking out the article!

        Reply
    6. Bry

      April 07, 2020 at 10:34 am

      Oh wow, I didn’t realise sourdough starter was so easy to make! This will be perfect to start whilst I’m on lockdown. Thanks for sharing!

      Reply
      • Beth Neels

        April 07, 2020 at 10:43 am

        It really is super easy Bry! Thanks for checking out the article! Good luck, let me know if you have any questions!

        Reply
    7. Pam

      April 07, 2020 at 10:19 am

      5 stars
      I’m anxious to try this, but I have a question: If it’s started with rye flour will the resulting breads you make have a rye taste? I see that you say to switch flour after a while, so I’m thinking not, but want to confirm. Perfect project for the times we’re in!

      Reply
      • Beth Neels

        April 07, 2020 at 10:42 am

        If you use white flour to bake your bread, it will not have a rye flavor, even if you keep rye flour for the starter. You don’t use that much starter to make recipes. Thanks for checking out the recipe and for your question Pam! Stay safe out there!

        Reply
    8. Erika

      April 07, 2020 at 10:10 am

      5 stars
      What a great post. I love sourdough bread, but have never made it from scratch. I can’t wait to try this.

      Reply
      • Beth Neels

        April 07, 2020 at 10:40 am

        Thanks Erika! Glad it is helpful to you!

        Reply

    Leave a Reply Cancel reply

    Your email address will not be published. Required fields are marked *

    Recipe Rating


    Primary Sidebar

    photo of Beth Neels aka Binky

    Welcome! Thanks for stopping by! I am Beth "Binky" Neels, wife, mother of 2 boys and 3 dogs! I will impart tips and tricks I have learned over the years, to make cooking easier and fun for you!

    More about me →

    Subscribe to our newsletter so you don't miss a recipe

    Popular

    • Air Fryer Hot Pockets | Homemade – Frozen
    • How to Dry Cranberries
    • Homemade Cranberry Vinegar
    • Smoked Meatballs

    TRENDING RECIPES

    • Hildabrötchen Shortbread Cookie with Jam
    • Haselnussmakronen, German Hazelnut macaroons
    • Santa Claus Cut Out Cookie Recipe
    • Gugelhupf – Kugelhopf
    • 125+ Edible Gifts – Fun for Any Season!
    • Ischler – Austrian Shortbread, Chocolate & Apricot
    • How to Make Vanilla Sugar {Vanillin Zucker}
    • Jam Filled Cookies
    photo of Beth Neels aka Binky

    Welcome! Thanks for stopping by! I am Beth "Binky" Neels, wife, mother of 2 boys and 3 dogs! I will impart tips and tricks I have learned over the years, to make cooking easier and fun for you!

    More about me →

    Subscribe to our newsletter so you don't miss a recipe

    Popular

    • Smoked Meatloaf
    • Roast Wild Duck
    • Blue Hubbard Squash Recipe
    • Canning Apple Pie Filling

    TRENDING RECIPES

    • Hildabrötchen Shortbread Cookie with Jam
    • Haselnussmakronen, German Hazelnut macaroons
    • Santa Claus Cut Out Cookie Recipe
    • Gugelhupf – Kugelhopf
    • 125+ Edible Gifts – Fun for Any Season!
    • Ischler – Austrian Shortbread, Chocolate & Apricot
    • How to Make Vanilla Sugar {Vanillin Zucker}
    • Jam Filled Cookies

    Footer

    ^ back to top

    About

    • Privacy Policy
    • Media Kit

    Newsletter

    • Sign Up! for emails and updates
    • Check out my Amazon Store!

    Contact

    • Contact
    • Services

    As an Amazon Associate I earn from qualifying purchases.

    Copyright © 2014-2022 Binky's Culinary Carnival